J-Link
19pinから5Vの供給が可能.最大300mA
stm32F301でJ-Link RTT の動作確認
CLIから書き込み
JLink.exe(JLInkExe)には予めパスを通しておく.
基本的にid君のブログの記事にあるようにスクリプトファイル作ってそれを実行すれば良い.
といってもJ-Linkに引数渡せばよい,各種コマンドはSEGGERのWikiもしくはマニュアルに書いてある.
J-Link Commander
FAQ・テクニカルガイド J-Link Commander」ツール
RTT
WSL上のVSCodeからWindowsのJ-Linkに接続、デバッグ
id君のブログを参考にした、この頃からJ-Linkのバージョンが上がった結果なのか、少し異なる方法で実現した。
WSL上のgdbからJ-Linkに接続する
J-Linkをインストールする
WSL2上のUbuntu(以下WSLと表記)にJ-Linkの環境一式をインストールする。.debパッケージをDLして
sudo apt install ./JLink_Linux_V788l_x86_64.deb
と入力してJ-Linkのソフト一式をインストールする
WindowsのJ-Linkの環境一式をインストールする。
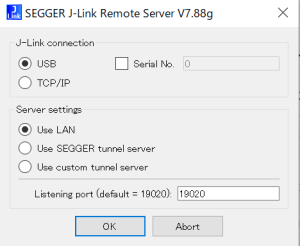
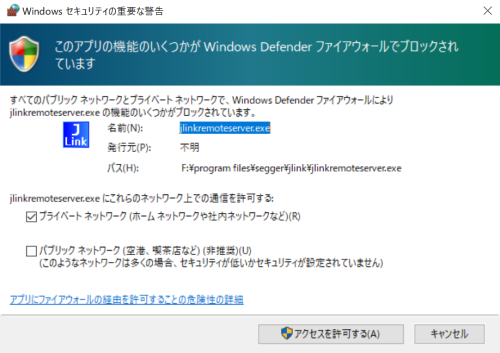
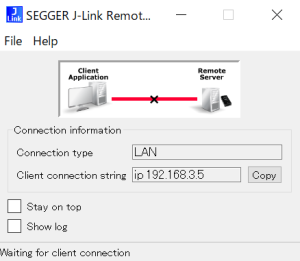
Windows側のRemoteServerを起動
WSL上のJ-LinkGDBServerの動作確認
(WSLでの操作)LinkGDBServerの接続テスト。ipはRemote Serverを指定する
WSL側からホスト(Windows)にUSB接続されたJ-Linkへアクセス
gdbの動作確認
WSL上のarm-none-eabi-gdbを実行しようとしたらエラーが出た
arm-none-eabi-gdb: error while loading shared libraries: libncurses.so.5: cannot open shared object file: No such file or directory
どうやらWSLでのパッケージ不足のようなので追加でインストールする
sudo apt-get install libncurses5
arm-none-eabi-gdbが起動するようになる
$ arm-none-eabi-gdb
GNU gdb (GNU Arm Embedded Toolchain 10.3-2021.10) 10.2.90.20210621-git
Copyright (C) 2021 Free Software Foundation, Inc.
License GPLv3+: GNU GPL version 3 or later <http://gnu.org/licenses/gpl.html>
This is free software: you are free to change and redistribute it.
There is NO WARRANTY, to the extent permitted by law.
Type "show copying" and "show warranty" for details.
This GDB was configured as "--host=x86_64-linux-gnu --target=arm-none-eabi".
Type "show configuration" for configuration details.
For bug reporting instructions, please see:
<https://www.gnu.org/software/gdb/bugs/>.
Find the GDB manual and other documentation resources online at:
<http://www.gnu.org/software/gdb/documentation/>.

For help, type "help".
Type "apropos word" to search for commands related to "word".
(gdb)
VSCodeでデバッグの準備
WSL上のVSCodeにCortex-debugをインストールする
launch.jsonにデバッグ設定を記述する
{
    "name": "WSL2_Debug(J-Link)",
    "cwd": "${workspaceRoot}",
    "executable": "./build/PAC5527_Hello.elf",
    "serverpath": "/usr/bin/JLinkGDBServer",
    "armToolchainPath": "/opt/gcc-arm-none-eabi-10.3-2021.10/bin",
    "ipAddress": "192.168.3.5",
    "request": "launch",
    "type": "cortex-debug",
    "servertype": "jlink",
    "device": "PAC5527",
    "interface": "swd",
    "showDevDebugOutput": "parsed",
    "runToEntryPoint": "main",
    "svdFile": "PAC55XX.svd"
}
armToolchainPath→WSL上のARM用GCCツールチェインのパス
serverpath→WSL上のGDBSeverのパス
ipAddress→RemoteServerのipアドレス
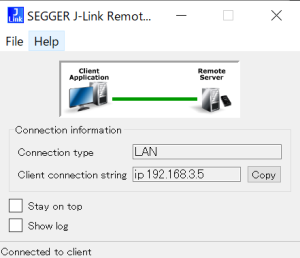
これでデバッグを開始すると、RemoteServerが接続され、ホストにUSB接続されたJ-Linkを経由してターゲットのデバッグができる。


